
The bathroom, which is the most contacted part of the house, is one of the most important components of daily life. Bathroom waterproofing project is relatively high for the entire link, such as the preparation of the early stage, the requirements of the waterproof material, the requirements of the project quality, the construction process flow, etc.. In general, whether the bathroom waterproofing practices are appropriate affects the use of the bathroom in the future. Life and comfort must be highly valued and strictly enforced. Today we come to understand the waterproof construction steps and procedures for the bathroom and kitchen.

| Waterproof construction process for toilets and kitchens: |
Primary treatment → Paste the contour line with textured paper → Apply the first pass of emulsion → Apply the second emulsion after drying → Drying → Closed water test
| Waterproof construction technology for toilets and kitchens: |
1. The grassroots floor should be cleaned up. The surface of the original wall surface should be solid and there should be no sanding, dust falling or hollowing.
2. Clean up the roots of the upper and lower water pipes and perform plugging treatment.
3. Use 10-15mm wide textured paper to paste the outline according to the height of the wall design and construction.
4, the first time the emulsion paint construction, the order from top to bottom, from inside to outside, not to miss the brush.
5. After drying for 24 hours, apply a second pass of the emulsion to form a complete waterproof layer of the emulsion in two passes.
6. After 24 hours of drying, conduct a water-sealing test for 24 hours. The water discharge height shall not be less than 30mm. No leakage shall be qualified within 24 hours.
7, After the surface cement mortar is pulled, it can be directly applied to the brick.
| Waterproof construction of bathroom and kitchen construction steps: |
The first step: do a good job of hydropower infrastructure
From a safety point of view, it is better to walk the bathroom water pipe wires than to walk below. However, many "guerrillas" are eager to work hard, water and electricity are on the ground, and even in the toilets, they open the ground and cut holes.
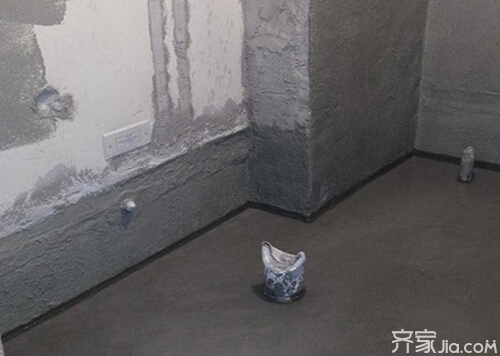
Step 2: Clean up the basement and walls
The house is waterproof, involving balconies, kitchens, and bathrooms, but the focus is on the bathroom. First of all, with a small metal hammer hit the wall, the ground, if you find the empty sound of the gong, which means there is an empty drum, you must knock out the empty drum. Then carefully clean up the four basements and the ground, remove the nails, and clean the dirt. It's best to rinse it with clean water and let it dry.
The third step: make the first level of rigid waterproof
Toilet water pipes can be changed, try not to change; if you want to change, do not use cement mortar to fill the pores, be sure to plug the king points to fill in three times. The most likely leaks in the room are the sewer pipes and the four corners of the corner. Therefore, these important parts should be given special attention. The ground must be divided into three blocks, with intervals. In this way, a layer of rigid waterproof armor is worn on the ground. Inside the bathroom threshold, there is a slope to be painted high to prevent the water from flowing back to the outside room, and the threshold stone must be slightly covered with fine cement mortar to plug the king.

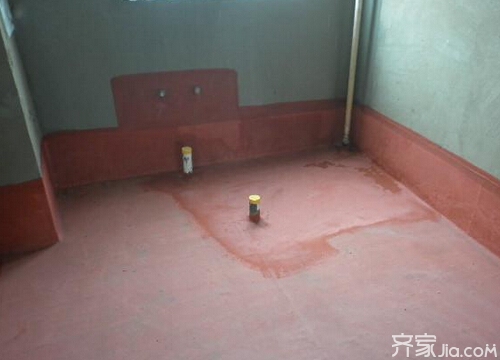
Step 4: Elastic waterproof coating does the second
For a long time in the new house, the hard plugging Wang Elastic Coating will be cracked live due to settling and lose its waterproof effect. Therefore it is necessary to add a second insurance - elastic waterproof coating. The first is to do the first wall moisture, so that more than one meter eight. Because people bathe the water and spray it on the wall tiles, the gap between the tiles is large. The water molecules easily enter the wall and penetrate the wall of the opposite room. As a result, the paint on the back of the bathroom falls off and the wallpaper becomes moldy and discolored. The wall surface should be damp-proof and then be plastered with a wall tile, and then be ground-repaired and waterproofed.
Summary: Looked at the waterproof construction steps and procedures for these bathrooms and kitchens. We also have a certain understanding of waterproof construction, so that even if the workers in the construction everyone can understand the significance of each step. Waterproofing is not a trivial matter, and every step must be done in order to avoid leakage accidents during subsequent use.
Decoration Waterproof Decoration Step Decoration Process Cement Coating Room Decoration Design Paint Bathroom Design Toilet Waterproof Bathroom Tiles Bathroom Doors Bathroom Leakage Kitchen Tiles Balcony Tiles ld Tiles
Flanged Hex Bolts
Zhejiang XianChuang Auto Parts Co.,LTD , https://www.showstrong.com